Making a Visual Novel with Unity (4/5) - Variables and state management
We have learned the basics of Ink, how to integrate your ink story with Unity, and how to use external functions to show and hide characters. This time we’re going to look at state handling in regards to variables and the game itself. As always, feel free to use the example files available here, or to work on your game. Let’s get started!
The example project uses materials from the game Guilt Free, which depicts someone struggling with an eating disorder. If you think this type of story may not be appropriate for you, please use your own files.
Variable state
You might remember, that ink allows you to introduce variables and to change their value as the story progresses. This can be then used to display some specific, otherwise blocked parts of the story, such as various dialog options based on your charisma level, etc. In some cases, it might be useful to be able to access those values within our C# code, for example, to update the health bar when the player receives damage. The way to achieve this is by using the variable_state property on the Story object, like so:
_story.variablesState["variable_name"]
You might have noticed that my ink file already has some variables which change as the story progresses. Let’s add some code to display their values when the game launches. We’ll need to update InkManager’s Start() function to do that.
void Start()
{
  _characterManager = FindObjectOfType<CharacterManager>();

  StartStory();

  var relationshipStrength = (int)_story.variablesState["relationship_strength"];

  var mentalHealth = (int)_story.variablesState["mental_health"];

  Debug.Log($"Logging ink variables. Relationship strength: {relationshipStrength}, mental health: {mentalHealth}");
}
As you can see, we can access all variables through _story.variablesState. Make sure the variable names are exactly the same as the ones in ink. When you hit run, your console should be showing the values.
Now, we could put this code in a separate function which we could call at any point to check the current values, but how do we know when to check for it? Would we do it every 5 minutes? Every time we display a new line? Or maybe… No, that’s not going to work. It would be just great if we could have some kind of a listener, which would update the values whenever they were changed in ink, right?. Luckily for us, we can do exactly that!
_story.ObserveVariable("relationship_strength", (arg, value) =>
{
  Debug.Log($"Value updated. Relationship strength: {value}");
});

_story.ObserveVariable("mental_health", (arg, value) =>
{
  Debug.Log($"Value updated. Mental health: {value}");
});
The arg parameter, in this case, will be the name of the variable which was updated. As you can see, we can set up variable observers and specify what exactly we want to do every time the value changes. We could use this to update the UI or maybe to start playing different, mood-specific music. Whatever you want to do with it, it can be very useful. Bear in mind, however, that the observer won’t be called in the beginning, so we need to use the variable state property if we want to know the variable’s initial value. Let’s update InkManager to handle that. First, let’s add some properties with private setters, which will log every update.
public int RelationshipStrength
{
  get => _relationshipStrength;
  private set
  {
    Debug.Log($"Updating RelationshipStrength value. Old value: {_relationshipStrength}, new value: {value}");
    _relationshipStrength = value;
  }
}

private int _mentalHealth;
public int MentalHealth
{
  get => _mentalHealth;
  private set
  {
    Debug.Log($"Updating MentalHealth value. Old value: {_mentalHealth}, new value: {value}");
    _mentalHealth = value;
  }
}
Next, let’s add a new function, which will handle variable updates. It’ll be called right after StartStory().
private void InitializeVariables()
{
  RelationshipStrength = (int)_story.variablesState\["relationship_strength"];
  MentalHealth = (int)_story.variablesState\["mental_health"];

  _story.ObserveVariable("relationship_strength", (arg, value) =>
  {
    RelationshipStrength = (int)value;
  });

  _story.ObserveVariable("mental_health", (arg, value) =>
  {
    MentalHealth = (int)value;
  });
}
Now we should always have up-to-date values available within our C# code!
Game State
We’ve covered most of the basic visual novel features, so the next thing we’re going to look at is how to save and load our game.
To do that, we’re going to introduce a new manager script, which will be responsible for all the game state related logic. Let’s create its skeleton to know what functionality we’ll need to cover next.
public class GameStateManager : MonoBehaviour
{
  private InkManager _inkManager;
  private CharacterManager _characterManager;

  private void Start()
  {
    _inkManager = FindObjectOfType<InkManager>();
    _characterManager = FindObjectOfType<CharacterManager>();
  }

  public void StartGame()
  {
  }

  public void SaveGame()
  {
    // Here we will collect all the data from other managers and save it to a file
  }

  public void LoadGame()
  {
    // Here we will load data from a file and make it available to other managers
  }

  public void ExitGame()
  {
  }
}
We will also need a SaveData class which will hold all the information we want to save about the game. Make sure to mark it with a [Serializable] attribute, as we will need to serialize the information it contains. For now, we’re only focusing on the ink story state, but we’ll add more data to it later.
[Serializable]
public class SaveData
{
  public string InkStoryState;
}
Saving game
Let’s focus on saving the game first. Ink provides a very straightforward way to save and load its state:
var storyState = _story.state.ToJson(); // export game state for saving
_story.state.LoadJson(storyState); // load state
We’re going to use this functionality to pass the current story state into the GameStateManager. Add the following method to your InkManager:
public string GetStoryState()
{
  return _story.state.ToJson();
}
Let’s move back to GameStateManager and start implementing the logic to save the game. We will need these two functions:
public void SaveGame()
{
  SaveData save = CreateSaveGameObject();
  var bf = new BinaryFormatter();

  var savePath = Application.persistentDataPath + "/savedata.save";

  FileStream file = File.Create(savePath); // creates a file at the specified location

  bf.Serialize(file, save); // writes the content of SaveData object into the file

  file.Close();

  Debug.Log("Game saved");

}

private SaveData CreateSaveGameObject()
{
  return new SaveData
  {
    InkStoryState = _inkManager.GetStoryState(),
  };
}
As you can see, the SaveGame() function uses another helper function to create a SaveData object and then serializes it into a new save file at the location we specified. Application.persistentDataPath is a path to a folder that can be used to store data between runs. Its exact location differs between platforms and the details are described here.
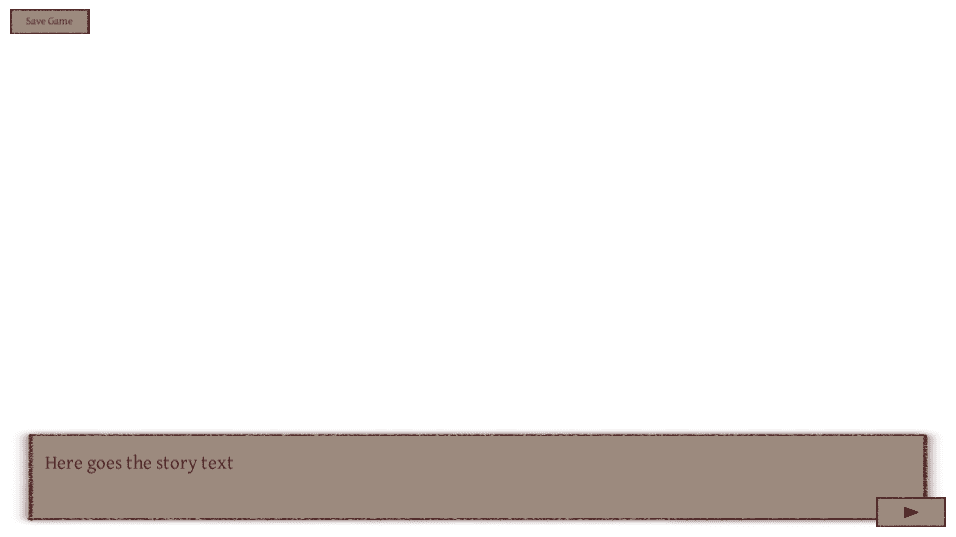
Let’s test this code. We’ll need to add a new button on the screen and link it to this function. Its script should look like this:
public class SaveGameButtonScript : MonoBehaviour
{
  GameStateManager _gameStateManager;

  void Start()
  {
    _gameStateManager = FindObjectOfType<GameStateManager>();

    if (_gameStateManager == null)
    {
      Debug.LogError("Game State Manager was not found!");
    }
  }

  public void OnClick()
  {
    _gameStateManager?.SaveGame();
  }
}
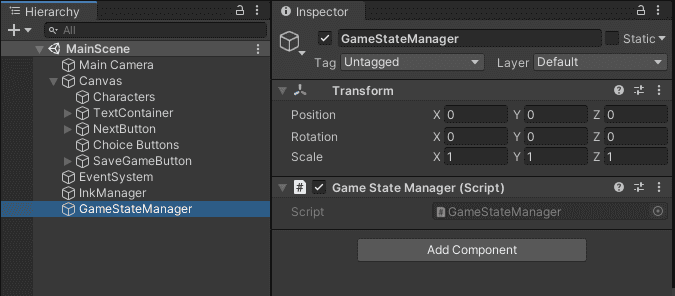
We’ll also need to create a new object to hold the GameStateManager script within the scene. Your hierarchy should be similar to this:
Let’s make sure our code works. Press play and try to save the game. You should see a new line (“Game saved”) within your console. If you want, you can also check if the save file is visible in the persistent data folder (check its path here).
Loading game
Time to implement the LoadGame() function.
public void LoadGame()
{
  var savePath = Application.persistentDataPath + "/savedata.save";

  if (File.Exists(savePath))
  {
    BinaryFormatter bf = new BinaryFormatter();

    FileStream file = File.Open(savePath, FileMode.Open);
    file.Position = 0;

    SaveData save = (SaveData)bf.Deserialize(file);

    file.Close();

    InkManager.LoadState(save.InkStoryState);

    StartGame();
  }
  else
  {
    Debug.Log("No game saved!");
  }
}
The Load() function uses the same FileStream and BinaryFormatter classes to handle the save file. We first check if the file exists and, if it does, we deserialize its contents into a SaveDataobject. Then we pass the ink state into the InkManager and start the game. Notice that we will be using a static function on the InkManager. That’s because loading will happen in a different scene (Main menu) and we want to make sure the state is preserved between scenes. Let’s make some changes to InkManager and implement that function then.
private static string _loadedState;

public static void LoadState(string state)
{
  _loadedState = state;
}

private void StartStory()
{
  _story = new Story(_inkJsonAsset.text);

  if (!string.IsNullOrEmpty(_loadedState))
  {
    _story?.state?.LoadJson(_loadedState);

    _loadedState = null;
  }

  // external function bindings etc.
}
As you can see, the LoadState() function will update the private static variable with the loaded state. We will then check it in the StartStory() function. If a loaded state exists, we use it to initialize the story and clear the variable to avoid potential confusion in the future. If not, we continue as usual, with a new story.
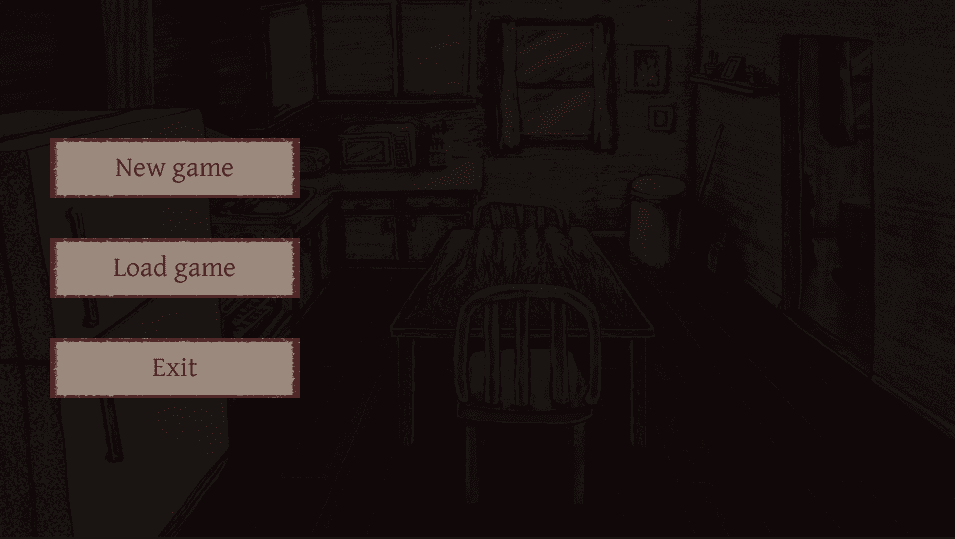
Let’s put everything together by adding the main menu. Go ahead and create a new scene with buttons to start a new game, load an existing one, or exit entirely.
We’ll need a script for each of those buttons. They will all be very similar, as we’re going to call GameStateManager functions from each of them.
public class LoadGameButtonScript : MonoBehaviour
{
  GameStateManager _gameStateManager;

  void Start()
  {
    _gameStateManager = FindObjectOfType<GameStateManager>();

    if (_gameStateManager == null)
    {
      Debug.LogError("Game State Manager was not found!");
    }
  }

  public void OnClick()
  {
    _gameStateManager?.LoadGame();
  }
}
In case of the script for the new game button, we will be calling _gameStateManager?.StartGame()and for the ‘Exit game’ button, it will be _gameStateManager?.ExitGame(). Make sure to add these scripts to the buttons within the editor and to add a new object with the manager itself.
Now, let’s implement those remaining GameStateManager functions:
public void StartGame()
{
  UnityEngine.SceneManagement.SceneManager.LoadScene("MainScene");
}

public void ExitGame()
{
  Application.Quit();
}
Go ahead and enter play mode. You should be able to save and load your game now!
You might notice a little problem though...
Character state
When you load the game, our characters will not be showing anymore! We’re only handling the ink state, but we don’t do anything with the characters. Let’s change that now.
First, we’re going to create a new class, which will work as a data container for all the information we’ll need when saving/loading the characters.
[Serializable]
public class CharacterData
{
  public CharacterPosition Position { get; set; }

  public CharacterName Name { get; set; }

  public CharacterMood Mood { get; set; }
}
Next, let’s create a function on the Character script, which will return a CharacterData object for each character.
public CharacterData GetCharacterData()
{
  return new CharacterData
  {
    Name = Name,
    Position = Position,
    Mood = Mood
  };
}
The place where we’re going to handle character state is CharacterManager. Let’s add the necessary code. It will be similar to how we approached it with InkManager.
public List<CharacterData> GetVisibleCharacters()
{
  var visibleCharacters = _characters.Where(x => x.IsShowing).ToList();

  var characterDataList = new List<CharacterData>();

  foreach (var character in visibleCharacters)
  {
    characterDataList.Add(character.GetCharacterData());
  }

  return characterDataList;
}
GetVisibleCharacters() will be used when saving the game. First, we select currently visible characters, and then, using the newly added GetCharacterData() function, we populate a new list which will be returned to GameStateManager.
Next, we need to add the code for loading state.
private static List<CharacterData> _loadedCharacters;

public static void LoadState(List<CharacterData> characters)
{
  _loadedCharacters = characters;
}

private void Start()
{
  _characters = new List<Character>();

  if (_loadedCharacters != null)
  {
    RestoreState();
  }
}

private void RestoreState()
{
  foreach (var character in _loadedCharacters)
  {
    ShowCharacter(character.Name, character.Position, character.Mood);
  }

  _loadedCharacters = null;
}
As you can see, we’re using the static context again, this time to populate _loadedCharacters. I’ve also added a RestoreState() function, which is called from Start(). If we have any characters to restore, this function will just iterate through all of them and show them on the screen using the ShowCharacter() function.
We still need to update GameStateManager and SaveData.
The latter will now look like this
[Serializable]
public class SaveData
{
  public string InkStoryState;
  public List<CharacterData> Characters;
}
There won’t be many changes within GameStateManager. We just need to make sure we added character-specific lines into our CreateSaveGameObject() and LoadGame() functions.
private SaveData CreateSaveGameObject()
{
  return new SaveData
  {
    InkStoryState = _inkManager.GetStoryState(),
    Characters = _characterManager.GetVisibleCharacters()
  };
}

public void LoadGame()
{
  var savePath = Application.persistentDataPath + "/savedata.save";

  if (File.Exists(savePath))
  {
    // file loading code

    InkManager.LoadState(save.InkStoryState);
    CharacterManager.LoadState(save.Characters);

    StartGame();
  }
  else
  {
    Debug.Log("No game saved!");
  }
}
Go ahead and press play. Your save system should be fully functional now!
Wrapping up
That’s all for today. I hope that you have a solid foundation for your visual novel now and that things started coming into shape. As always, if you want to check my code for this tutorial, you can access it here. And if you need any help, don’t hesitate to get in touch on Twitter.
Happy coding!
All visual assets and sprites used in this tutorial are drawn by Erica Koplitz for the game Guilt Free, created together by me and Erica.
More in this series
- Making a Visual Novel with Unity 1/5 - Introduction to ink
- Making a Visual Novel with Unity 2/5 - Integration with ink
- Making a Visual Novel with Unity 3/5 - Characters and emotions
- Making a Visual Novel with Unity 4/5 - Variables and state handling
- Making a Visual Novel with Unity 5/5 - Localisation


